Guidelines for the preparation of figures
This checklist will guide you in submitting figures for your article. While we accept various formats, sizes, and resolutions, we encourage you to submit the highest quality figures possible. Check the table below for preferred formats and follow our guidelines to ensure ethical best practices in figure preparation and submission.
Checklist for submitting figures
Before you submit, please ensure that you have checked over the following:
- All figures are included as separate files or in a single PDF/Word document/LaTeX suite. Separate, original files in their original file format are preferred. Each figure has an accompanying legend describing the content and explaining any abbreviations or symbols. Figure legends should be included as a separate section in the main text file.
- All figures are cited in the main text of the article and numbered in the order in which they appear. All words or symbols in the figures are large enough for easy reading and you have followed the preferred resolution guidelines for the best presentation.
- Figures are saved in the preferred file types for best image quality. You may submit a PDF for initial review if in doubt.
- Each individual figure file is less than 10 MB, with unnecessary white space removed to reduce file size.
- Figures are created at a size between 80mm and 180mm in width and between 300dpi and 600dpi. Each figure file is named with its appropriate figure number only.
How to prepare your figures
|
Description |
Example |
Preferred format for submission |
Acceptable format for submission |
Preferred format after your article has been accepted |
|
|
||||
|
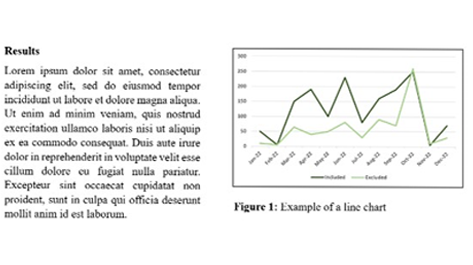
Line art: Includes graphs, flowcharts, diagrams, scatter plots, and other text-based figures that are not tables. Important! If a figure includes both line art and images, follow guidelines for line art |
|
|
Any standard file type. When in doubt, submit a PDF |
Any standard file type |
|
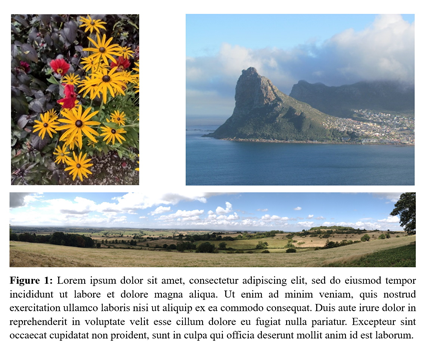
Images: Images include photographs, drawings, imaging system outputs (such as MRIs or ultrasound), and other graphical representations |
|
PNG, TIFF |
Any standard file type. When in doubt, submit a PDF |
Any standard file type |
|
|
||||
|
Line art: Resolution for line art needs to be higher than for images because each individual line must be more precisely rendered. Tip! Larger fonts make for easier reading |
|
600 dpi |
Any, as long as it is legible to the editor and peer reviewers |
600 dpi |
|
Images: Although many web-based images often appear at very low resolutions, readers will benefit most from your research if your images offer high-resolution detail |
|
300 dpi |
Any, as long as it is legible to the editor and peer reviewers |
300 dpi |
|
|
||||
|
Small: Used for small line art and images that will occupy one-quarter of the page |
|
At least 80mm canvas size or 1800 pixels wide |
Any, as long as it is legible to the editor and peer reviewers |
At least 80mm canvas size or 1800 pixels wide. Smaller or larger images will be modified during composition, which may reduce quality |
|
Large: Used for larger line art and images that occupy a half-page or an entire page. Carefully consider the minimum space necessary for each figure |
|
At least 80mm canvas size or 1800 pixels wide |
Any, as long as it is legible to the editor and peer reviewers |
At least 80mm canvas size or 1800 pixels wide. Smaller or larger images will be modified during composition, which may reduce quality |
|
|
||||
|
Individual files: Individual figures may load slowly or time-out slower systems if they are too large |

|
Less than 10 MB each |
Any, but large files may be difficult for editors and reviewers |
Any, but large files may be harder to transfer |
|
Complete, zipped package of article files: Submission systems often limit total file size |
|
Less than 500 MB total |
Any, but large files may be difficult for editors and reviewers |
Any, but large files may be harder to transfer |
|
|
||||
|
To facilitate ease of review, name figure files only with the word ‘Figure’ and the appropriate number |
|
One figure per file |
All figures in a single PDF, Word document, or as a part of a LaTeX submission |
One figure per file |
|
|
||||
|
Use Arabic numerals, follow the order in which the figures appear in the manuscript, and explain any abbreviations or symbols that appear in the figure |
|
A separate ‘Figure legend’ section in the manuscript, after the references |
Anywhere in the article, clearly indicating which figure it explains |
Anywhere in the article, clearly indicating which figure it explains |
Ethical guidelines
As stated in our Best Practice Guidelines on Research Integrity and Publishing Ethics, changes to images can create misleading results when research data are collected as images. It may, however, be legitimate and even necessary to edit images. Images are subject to screening, and journals will ask authors to declare where manipulations have been made. Authors may be asked to supply original images and should be able and ready to supply them on request. Failure by authors to address concerns adequately may lead to rejection. You should follow the guidance below when preparing your images:
- Specific features within an image should not be enhanced, obscured, removed, moved, or added.
- Adjustments to brightness or contrast are only acceptable if they apply equally across the entire image and are applied equally to controls, and as long as they do not obscure, eliminate, or misrepresent any information present in the information originally captured. Overexposure and high-contrast images should be avoided. If high contrast is required to visualize a certain band, then it should be declared in the legend, and the unmodified original image must be provided for comparison.
- Excessive manipulations, such as processing to emphasize one region in the image at the expense of others, are inappropriate, as is emphasizing experimental data relative to the control.
- Nonlinear adjustments or deleting portions of a recording must be disclosed in a figure legend.
- Authors are advised to store the original, unadjusted image data for 5 years following publication.
- The presence of artifacts in images, if any, should be mentioned and explained in the figure legend. ‘Artifacts’ includes features introduced while image capturing and processing, but which are not a part of the real image.
- In cases where image processing is required for the interpretation of data, details of image processing, including the software and the enhancement technique used, must be declared in the Methods section of the article.
- Constructing figures from different gels, fields, exposures, and experimental series is discouraged. When this is necessary the component parts of composite images should be indicated by dividing lines clearly demarcated in the figure and described in the legend.
- Cropped images should be avoided for gels and blots. Wherever cropped images are shown in figures, a full scan of the entire original gel(s) must be submitted as part of the supplementary material. Gels and blots should not be dropped onto white or any other background.
- Control samples should be run on the same blot or gel for each experiment. Relevant controls must be included in each figure. Where control images are re-used for illustrative purposes, this must be declared in the figure legend.
- Source data should be submitted alongside any images that have been processed. All blots from the original materials should be marked respective to the figure number, and those elements used should be highlighted in the original materials using a dotted line to encircle the relevant band(s).
- Micrographs should include scale bars, and the level of magnification should be provided. Method of sample preparation, details of stains used, information about the microscope, camera, and any image capturing or editing software used should be provided in the figure legend or the Methods section of the article. If any specific region is marked and magnified, then care should be taken to see that the features in the inset and the magnified panels match and are in the same orientation.
- Images obtained from published sources can be re-used with appropriate consent from the copyright owner and should be stated in the figure legend alongside the citation.
- Signed consent for publication is required from the patient or their guardian for photographs, X-rays, or scans of patients' body parts included as part of the manuscript. Any part of the image that reveals the patient’s identity, e.g. the patient’s name or ID number, should be blurred, masked or cropped out before submission.
How to avoid frequent errors with images?
Here are examples of the most frequent errors with images, and tips on how to avoid them.
|
Error |
Example |
Explanation and tips |
|
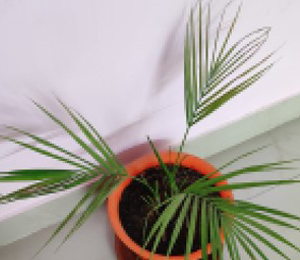
Low Resolution |
|
The image appears blurred or pixelated upon zooming in to around 150% magnification. TIP: Check image resolution immediately after capture. Export the final image file as a PDF and then convert it to TIFF to prevent loss of resolution. The final resolution of photographs should be a minimum of 300 dpi. |
|
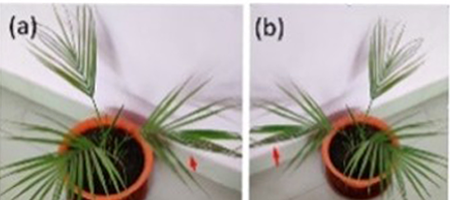
Image Orientation |
|
The image in figure (b) is the flipped/rotated/inverted version of figure (a). TIP: Ensure that the images in sub-panels are correctly orientated. While magnifying an inset, the orientation should be kept the same. Do not flip or rotate the image. |
|
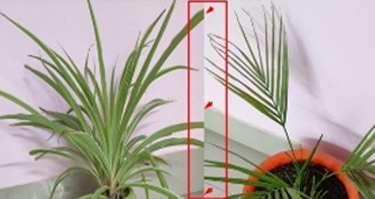
Image Presentation |
|
Two different images have been joined together and presented as one single image. TIP: Image grouping and splicing must be clearly stated in the figure legend. Clear demarcations must be provided for each image. |
|
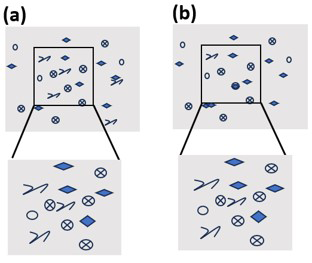
Mismatch of cellular sections |
|
For the left panel, the enlarged section corresponds with the region enclosed within the black box; this is not true for the right panel. TIP: Ensure there is no mismatch between the original image and its magnified version. |
|
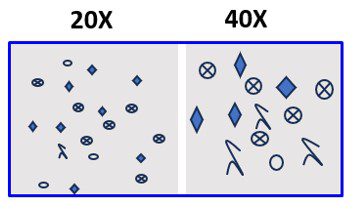
Magnification panel mismatch |
|
The 40X magnification panel doesn't correspond to the features shown in the 20X magnification panel. TIP: Ensure there is no mismatch between the higher magnification image and its corresponding lower magnification image. The same field should be captured for both lower and higher magnification. If the field varies then this should be explained in the legend. |